
When you are creating a polyhedron in Blender, three most important
things that you must keep in your mind are:
- The planes that make up the polyhedron
- Dihedral angle between the faces
- Angles between planes, if they are flattened.
Let us create a Dodecahedron.
1. Open Blender. Start by deleting the default cube (Press “X” and delete)
2. Create a Cylinder Add>>Mesh>>Cylinder

3. Edit Cylinder Parameters in Tool Shelf. Set vertices = 5 & Depth = 0
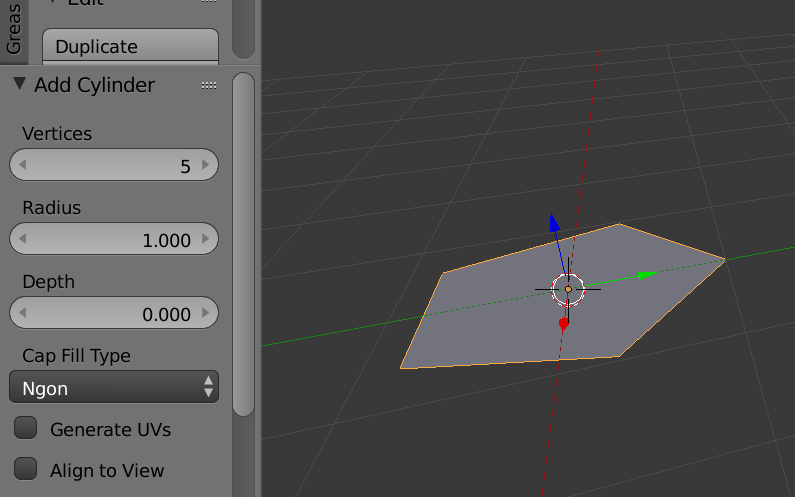
4. Goto Top View. Press Numpad 7 (or View>>Top in 3D View Menu)
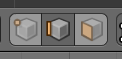
5. Goto Edit Mode (Press Tab). Click on Vertex Select
![]()
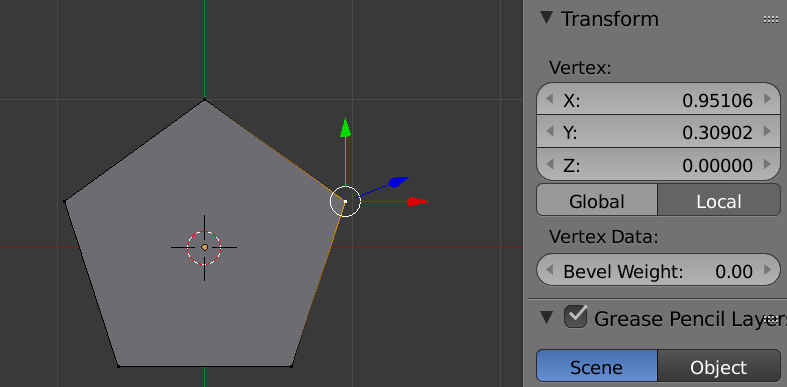
6. Right Click on rightmost vertex (top right). Copy its X-Coordinates from Properties panel.
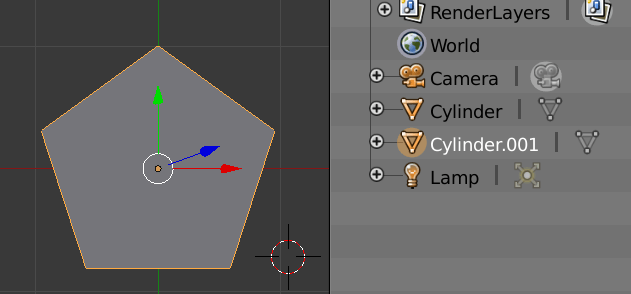
7. Goto Object Mode.
8. Duplicate pentagon by pressing “Shift + D“. Right click to place it on the existing pentagon. Now you must have two objects in outline view – Cylinder & Cylinder.001
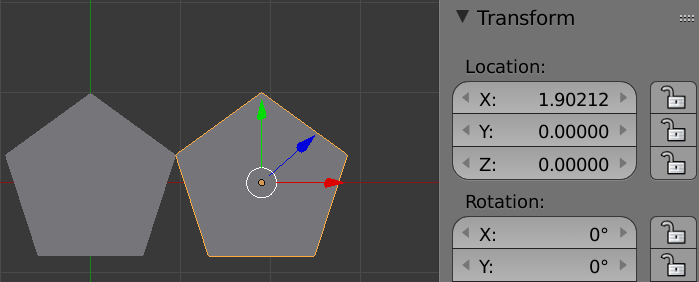
9. Open Properties panel and enter new X-Coordinates for Cylinder.001. The new X-Coordinates are twice the X-Coordinates copied in step 6. In my case I entered 0.95106*2 to get 1.90212
10. Goto Edit Mode for Cylinder.001. Click on Vertex Select. Unselect vertices if they are selected by pressing “A” once or twice.
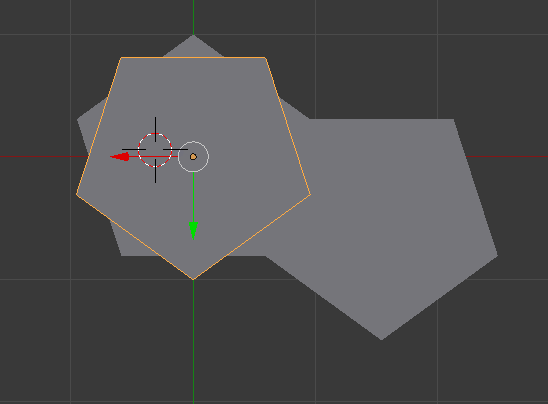
11. Press Shift and right click on all vertices of Cylinder.001 one after the other. The common vertex between Cylinder & Cylinder.001 should be the last selected vertex (so that it becomes active element).
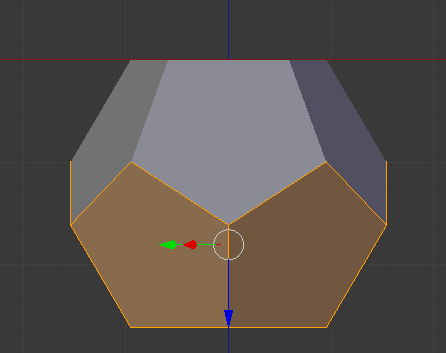
12. Set Pivot Point as Active Element and change Transform Orientation to Normal.
![]()
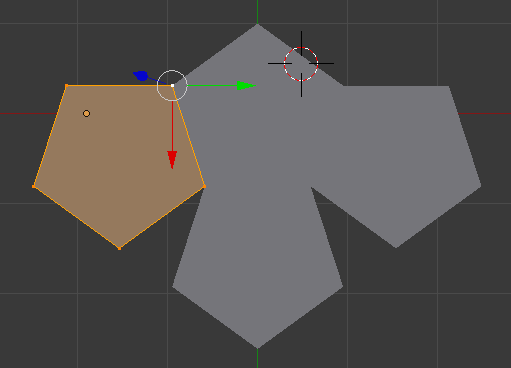
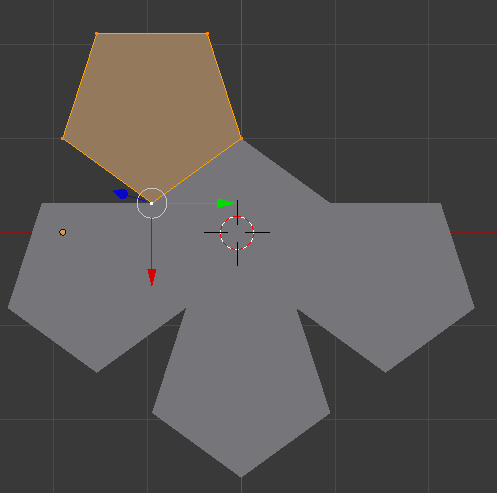
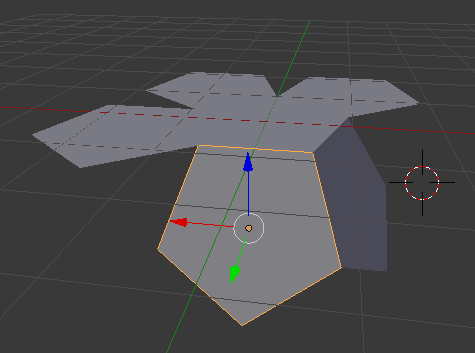
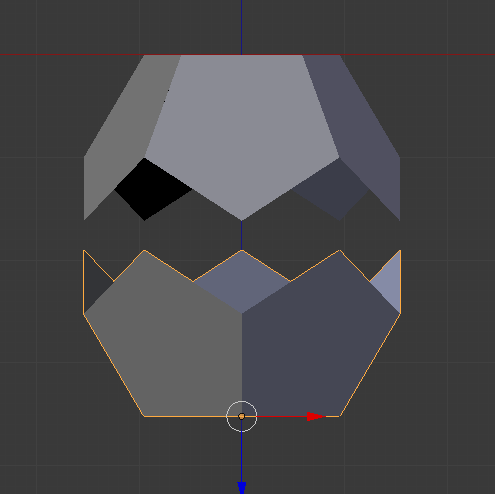
12 Rotate 36 degrees around common vertex (press R then 36 then Enter), to join both pentagons at a common edge. Goto object Mode.
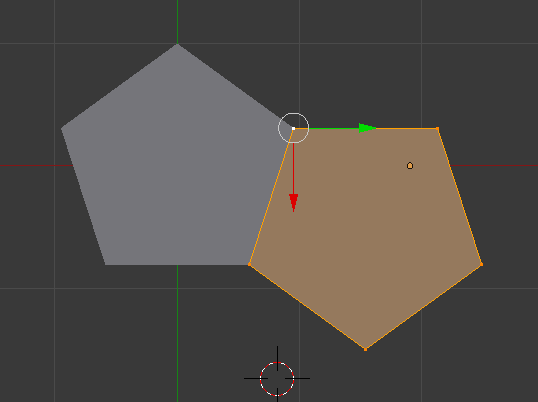
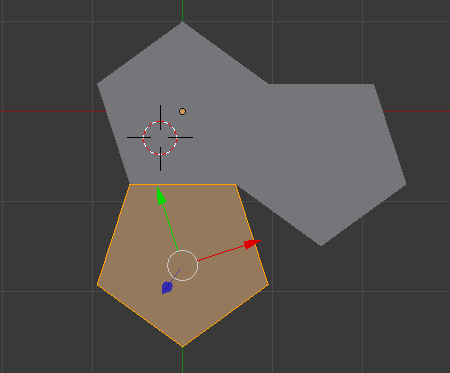
13. Select & Duplicate Cylinder by pressing “Shift + D“. Right click to place it on the existing pentagon
14. Rotate Cylinder.002 180 degrees on Z-Axis by pressing RZ180 and then press Enter.
15. Edge Select in Edit Mode.
16. Turn snapping on (Horse shoe magnet shape) by pressing Shift + Tab . Set Snap Element to Edge.
17. Move along Y-Axis, by pressing GY. First move it (Cylinder.002) away from central pentagon (Cylinder) and press LMB. Then again move it (Cylinder.002) along Y-Axis, by pressing GY, to snap it to lower edge of central pentagon (Cylinder).
18. Copy Leftmost X-Coordinate of central Pentagon just like step-6. Move to Object Mode.
19. Select & Duplicate Cylinder by pressing “Shift + D“. Right click to place it on the existing pentagon.
20. Like in step 9, this time move twice in negative direction. In my case I entered –0.95106*2 to get –1.90212.
21. Follow steps 11 & 12 for Cylinder & Cylinder.003.
22. Rotate -36 degrees around common vertex (press R then –36 then Enter), to join both pentagons at a common edge. Goto object Mode.
23. Select & Duplicate Cylinder by pressing “Shift + D“. Right click to place it on the existing pentagon. Follow step 20. Follow step 21 for Cylinder and Cylinder.004.
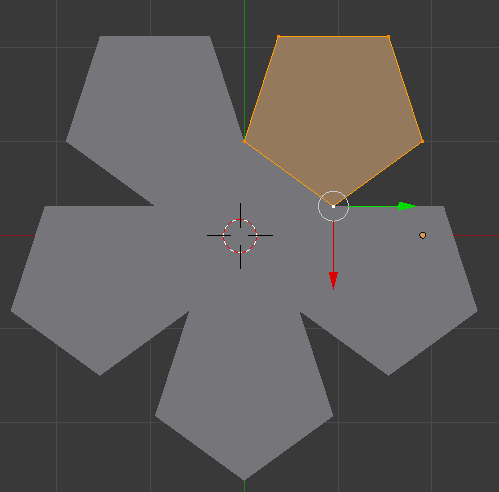
24. Rotate 108 degrees around common vertex (press R then 108 then Enter), to join both pentagons at a common edge. Goto object Mode.
25. Select & Duplicate Cylinder by pressing “Shift + D“. Right click to place it on the existing pentagon. Follow step 20 for positive value 0.95106*2 to get 1.90212. Follow step 21 for Cylinder and Cylinder.005.
26. Rotate -108 degrees around common vertex (press R then -108 then Enter), to join both pentagons at a common edge. Goto object Mode.
27. Goto each Pentagon and Set Origin to Origin to Center of Mass.
28. Repeat steps 29-31 between Central Pentagon (Cylinder) and other Pentagons (Cylinder.xxx).
29. Select Cylinder.xxx and goto Edit Mode. Click on Edge Select. Set Pivot Point as Active Element and change Transform Orientation to Normal. Press “A” once or twice to deselect all edges.
30. Press Shift and right click on all edges of Cylinder.xxx one after the other. Select common edge between Cylinder & Cylinder.xxx last.
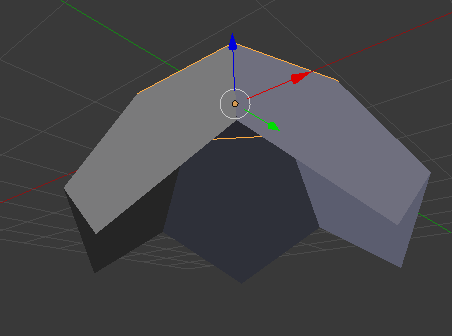
31. Rotate –63.43 degrees around common Edge (press RYY then –63.43 then Enter) between Cylinder and Cylinder.xxx. Goto object Mode.
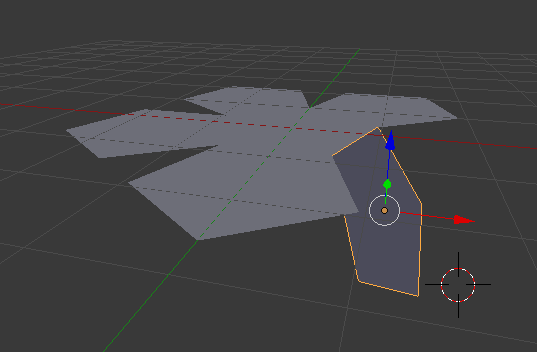
32. First half of your Dodecahedron is ready.
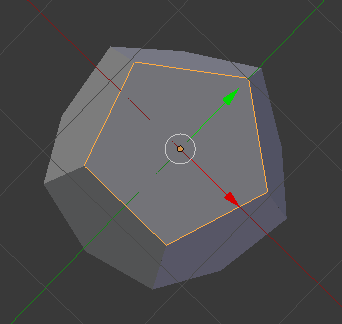
33. In Object Mode select Wireframe shading. Press “B” and border select whole half of Dodecahedron. Press “Ctrl+J” to join all pentagons in one figure. Now you should have only one Cylinder in outline view.
34. Goto Edit Mode and Press Remove Doubles in Tools Shelf. Goto Object Mode.
35. Goto Front Ortho View (Numpad 5 and Numpad 1). “Press Shift+D” to duplicate the object. Right Click to place on the top of existing half of dodecahedron.
36. Rotate 180 degrees on X-Axis by pressing RX180 and then Enter.
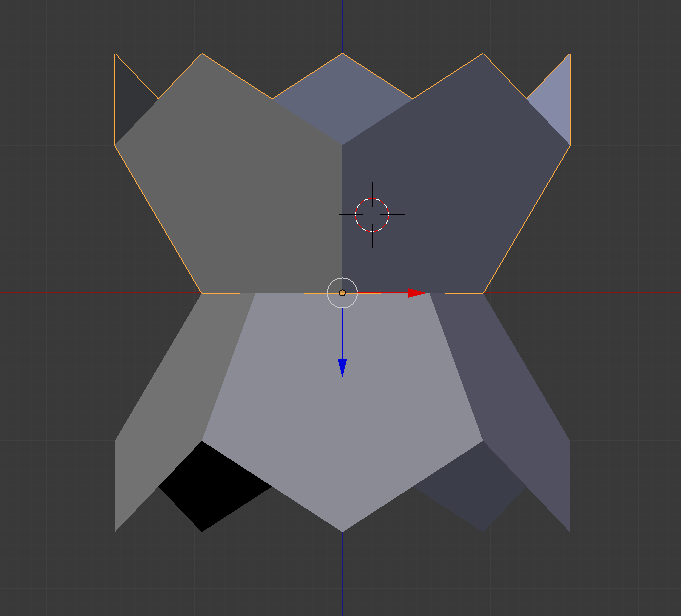
37. Move new half to below the first on Z-axis by pressing GZ and then moving mouse down. Press LMB to place object along Z-axis. Do not join the two halves in first attempt.
38. Goto Edit Mode. Turn snapping on to vertex. Press “GZ”, then move lower half above to join with top half. Goto Object Mode.
39. Select both halves. Press “Ctrl + J” to join two halves. Goto Edit Mode, Remove Doubles. Goto Object Mode. Your Dodecahedron is ready. move it, scale it…

Download Blend File
perfect
thank you for a very good article